

Facebook (now called Meta) ads are a highly effective way to market your Shopify products. With an extensive base of 3 billion daily users, this platform lets small to big businesses create ad campaigns to establish a bond between the customer and the brand.
To run your Facebook ads, you must set up accounts, pages, and apps that help manage and procure good sales. They streamline the process of setting up your Shopify Facebook ads by tracking the clicks your ad receives and helping you identify your target audience. Moreover, you can edit, retarget, and create more campaigns easily.
We shall now delve into the creation and installation process to kickstart your Facebook advertising journey.
Table of Contents
What To Consider Before Running Facebook Ads For Shopify?
Before running ecommerce Facebook ads, you need to map out all the crucial points that will help garner clicks. When you set realistic goals, getting traffic to your store becomes easy; ask yourself what you want to achieve – sales, clicks, brand awareness, etc.
Let’s see the vital points you need to touch upon:
1. Your Target Audience
Reaching the right audience is like hitting the jackpot; if your ads reach the right audience, you will see high conversion rates. Your money can go down in the dumps if it does not reach the right people.
One way to determine where your target audience is heading is by using Audience Insights- it helps extract data, run competitive analysis & gives insights into potential customers.
2. Setting Up Facebook Pixel
Facebook Pixel is an important element in the ads campaign. It is essentially a code snippet that helps run effective advertisements and track your store’s visitors. We shall learn more about it in the later part of this blog.
3. Know The Conversion Rate
Conversion rates help analyze the return on investment, predict the performance of your ads, and resolve any existing issues. It’s also helpful in planning how much to spend and how much money you might make from those ads. Take an average conversion rate from all the businesses that sell similar products or services and develop your own conversion rate.
Facebook Ads Checklist For Shopify

Setting up your Business Page, Ads Account and Ads Manager is important before you run your ad campaign on Facebook. The interconnection helps with managing your ads profile and Facebook Shop.
Let us delve into the Facebook checklist that every advertiser must have before advertising.
1. Facebook Business Page
A Facebook Business Page helps create a public presence for businesses, such as those on Shopify. It connects you online to your audience and works similarly to a personal Facebook account. Brands advertise their products and services on Facebook using links, status updates, images, and videos.
It is a versatile way to market your products as your Facebook Page is public. Google’s algorithm helps index your Facebook Page to reach several people.
You access the following features in Pages:
- Business Information – Address, contacts, hours, categories, etc. related to your business.
- Posting – Posts help with sharing information. It is quick and hassle-free, and you can add buttons to make your audience take action.
- Messaging – Inbox to communicate across various marketplaces.
- Tools – Events & Appointments help with connecting with your customers. Jobs help with hiring.
- Insights – You get an idea of your audience’s behavior and can track their activity to launch campaigns targeting their interests, needs, and other businesses they’re visiting.
The setup takes a few minutes and is completely free. Follow the steps below to create your Facebook Page.
- Login to your Facebook. Locate ‘Pages’ on the left side of your screen.

- From there, look for a blue ‘Create New Page’ button.

- Give your Page a name and fill in the fields – category and bio.
Category – Customers learn about your products and services. For example, clothing, pet apparel, toys, etc.
Bio – A description of your store and your whereabouts. You provide general information about your products to your potential customers.

- After filling them up, click Create Page.
- You will get a success message at the bottom.

- Provide your contact details, email address, location, and location hours. Click Next.
- You can track the health of your Page in the health bar that appears below.

- Add profile and cover pictures. They will help boost the health of your Page.
- Fill in all the details they ask.
- You can also invite people to your store. It is optional.
- Finally, click Done.
Your page shall be created.
2. Business Manager Account
A Facebook Business Manager (or Meta Business Suite) Account is where you combine your business data and Facebook marketing activity in one place.
It can quickly give your team members, partners from other organizations, and vendors access to assets.
It is best for businesses that need access to assets like Pages, ad accounts, Custom Audiences, Meta Pixels, and verified domains. Using Business Manager to manage and control all Facebook assets and accounts for your ads is crucial.
Here are its features:
- You have the full control. You can centrally control and manage access and permissions for all your assets.
- Your personal account will remain safe when you work in a team with several ad accounts.
- It is secure.
- You can track and enhance performances across several ad accounts and Pages.
The people who must use this account are:
- Organizations that must finish the verification process.
- Advertisers for credits and billing.
- Advertisers using Custom Audiences.
- Publishers.
- People who need to verify their domain.
Now, let us see how to set up your Facebook Manager Account-

- Visit the Meta or Facebook Business Manager website and click ‘Create an Account.’
- Add the name of your business, your name, and your business email address, and enter. You’ll reach this page:

Your Facebook Manager Account Setup is complete. Now, you can create your Facebook Ads Account.
3. Facebook Ads Account
This account runs your paid ads and stores and evaluates your ad campaigns. It comes under your business manager account. It is also called a Meta Ads Account.
Follow these steps to create one:
- After creating your Manager account, you’ll enter Business Settings in the Meta Business Manager. On the left menu, locate Accounts and choose Ads Accounts.

- On the top right, click on Add Ad Accounts. On that, click Create a New Ad Account.
- Enter the name of your ad account, and select the time zone and your currency. Click Next and choose ‘My business (your-business-name).’
- In Add People and Set Permissions, choose who will manage the ad account. If you are managing, click on your name and select the type of control you want.

- Read the terms, accept them, and click ‘Assign.’

Your Facebook Ads Account is ready. Let’s see if you need a Facebook channel app or not.
Pro Tip: To create more dynamic ads specially tailored for your audience, try Advantage+ campaigns by Meta, which provide a smoother way to run ads.
4. Facebook Pixel
Facebook Pixel (or Meta Pixel) is a code snippet that helps optimize, calculate, and target the audience for your advertisement campaigns. It lets you analyze the customers’ interaction with your website. Pixel helps you see customer activity – page views, conversions, items purchased, advance matches, etc. One needs to connect it to their Shopify store so that Facebook gains access and makes the ads reach potential customers.
Also, Facebook uses its own Conversion API to establish a connection between the server and the advertiser’s data.
There are two ways to add a pixel –
- Manually adding it via Facebook
- Using Shopify Facebook Apps
Manually Adding Pixel Via Facebook
Adding pixel manually involves adding the pixel code to your Shopify store. The process may sound technical, but it is not.
This method involves picking the code from Facebook’s Events Manager and adding it directly to your website’s theme editor. Here’s how you can do it –
- On Events Manager, locate Add Events > From A New Website.
- Choose ‘Install Code Manually.’
- Then, locate your theme editor on the Shopify admin.
- Paste the code between the <head></head> tags and save it.
Your pixel is set and ready to run.
Shopify Facebook Pixel Apps
Another way to use and add a pixel is by integrating Shopify apps for Facebook pixel. These apps help generate and run your pixel without any additional steps.
Some apps offer fewer steps and faster setup, like AdNabu’s Facebook Pixel app. It’s hassle-free, connects your Shopify store to Facebook, and tracks conversions seamlessly – no need for complex setups with Facebook & Instagram sales channels. Plus, it’s free to use!
With this app, you can easily manage all your pixels, get detailed event analytics, and implement advanced matching, all within your Shopify admin.
Here is how the app provides a smooth experience –
- Removes the hassle of fitting the pixel in the website’s theme.
- It generates pixel code based on the events (customer activity) you fetch.
- Quickly connects your pixels on Facebook to Shopify in just a couple of clicks.
- Enables advanced matching (for purchase & initiate checkout events) & Conversion API (for purchase events).
You can run the app in three simple steps –
- Installation – Install the app from the Shopify app store. Connect your Facebook business account with your Shopify admin.
- Adding Pixels – After connecting the two, on the app’s homepage, you will see all your pixels appear in a dropdown. If you do not see them, click the refresh (or sync) button on the right side of the dropdown menu. If you haven’t created any pixels, go to Events Manager and create one. The newly created pixel will appear in the app.
- Running Pixels – Enable the pixel, add events, copy the script generated below, and paste it into Customer events in the Shopify admin settings.
You can also check out other pixel apps –
| App Name | Features | Pricing | Purpose |
| FBTrack ‑ Facebook Pixels App | Uses Conversion API. Add multiple Facebook Pixels as a backup. Unlimited server-side tracking. Fast reporting and upgrades. Quick setup and in-app guides. | Free for 7 days. $7.99/month | For Pixel |
| OnePixel Facebook Pixel, TikTok | No code platform. Automatic pixels installation. No need for an account connection. Instant build for Facebook Custom Audience & Lookalike Audience. Events tracking. | Starter: Free Standard: $9.90/month Professional: $19.90/month Advanced: $29.90/month | For Pixel |
Omega Facebook Pixel Ad Report | Events are auto-tracked. Quick Pixel set up in 2 mins. Real-time UTM attribution report. Offers an intuitive dashboard. Automated catalogs & Live Feed Links save time. | Two Owls Standard: $15.99/month Enterprise: $20.99/month | For Pixel |
| Also Read: Best Shopify Facebook Product Feed Apps. |
Do I Need The Facebook Channel App On Shopify?
When connecting your Meta account(s) to your Shopify store, you need a sales channel app that bridges your accounts on these two platforms. This is possible by the Facebook & Instagram app (by Meta). It is available on all Shopify plans.
The linking makes the eligible items in your catalog accessible for marketing across Meta technologies, both Facebook as well as Instagram. The app also helps create ads, enhance sales, and automatically sync your products to your Shopify store. This way, you can manage your orders and even reach out to potential buyers.
Using the Facebook & Instagram app is not the sole method. There are other sales channel apps that serve the same purpose. They may vary in features and pricing.
Requirements For The Facebook & Instagram App On Shopify
Let’s get started with the requirements of the Facebook & Instagram app –
- You must have a Facebook account and a Shopify store. If you don’t have a Facebook account, you’ll be asked to sign up before installing the app.
- You must also have a Shopify admin account to run the app. That is where you’ll be adding the app to your Sales Channel.
- If you have a personal ad account, connect that account to the Business Manager.
Exporting Your Shopify Product Feed To Facebook
After creating all the required accounts for Facebook ads, you must export your Shopify feed to Meta Commerce Manager.
For this, you can try AdNabu. It creates a distinctive product feed URL with personalized UTM parameters. To do so, follow the steps:
- On Shopify admin, go to Marketplaces in the app.

- After opening the Marketplaces, select Facebook and Instagram Marketplace.

Scroll down and locate the Data Feed URL.

- Copy the Data Feed URL and open the Catalogue section of the Meta Commerce Manager.
- Then, locate Data Sources > Add items.
- In that section, select Data Feed and paste the URL.
Another way is to manually upload the file. For that, follow the steps:
- Use AdNabu or any other product feed application to get the Feed URL, or go to the Shopify admin account > Products.
- In the Products section, click on Export on the top right side.

- Download the CSV file format.

- Now, go to Meta Commerce Manager. Navigate to Catalogue. If you have not created one, then click on Create A Catalogue. This page appears after you click ‘Get Started’ if you’re new or in the Assets section.

- Since our store comes under E-commerce, select that.

- Choose a partner platform.

- Finally, your Catalogue is ready.

- On the right side, click on Add Items. You’ll reach this page:

- Select Data Feed. It will list the instructions you need to follow.
- Choose the type of upload. Since we have downloaded the CSV file from our Shopify admin, we will choose to upload it from our computer.

- After uploading, click Next.
- Select the currency and start the upload. It will take some time to upload. Check all the warnings you receive, for example, ID duplications, GTIN checks, etc. After fixing those, your products will finally be exported to Facebook.
Other methods for exporting include using a Data Feed URL, connecting your Pixel, linking your Shopify, or manually adding the products by filling out a form.
Using a product feed management app streamlines the operation and syncs your product feed efficiently across all marketplaces.
Facebook Ad Campaign Set up
Once everything is set up, you can finally run your ad campaigns! You create, upload, and publish your ads in the Ads Manager.
Let us jump right into it!
You have created all the necessary accounts, pages, and Pixel. It is time to link them all together –
- Link your Facebook Channel app. Connect Your Facebook Account(s).
- Choose Set up in Facebook Marketing on the Shopify dashboard. Select Connect to link your Facebook account.
- Connect your business manager account, Facebook ad account, and Facebook Page for ad campaigns.
- Connect Facebook Pixel to the data sharing level. Select a target country for your Facebook ads reach.
- Finally, click Finish Setup.
Since we have installed the app, it is time to create and run our ad campaign-
- On Facebook Business Manager (or the Meta Business Suite), locate All Tools > Advertise > Ads Manager.

- Before creating an ad campaign, confirm that your Facebook account is linked and select a payment option – PayPal, credit card, etc. After clicking Ads Manager, click Account Overview on the left panel to check.

- Locate Campaigns on the left panel > + Create.

- After you click Create, this will appear:

- Decide the objective of your ad campaign and give it a name. Move to Ad Sets on the left.

- Click on New Sales Ad Sets and give it a name. Select the type of conversion.
- Set the budget, target audience, locations, detailed targeting, and other attributes.
- Go to New Sales Ad. Here is where you’ll develop your ad for your audience.
- Change the Ad Name and check if the correct Facebook account is linked.
- You can either upload it manually or choose media from the Catalogue. Also, choose the ad format for publishing.

- You can create more ads with the Ad Sets by duplicating them.
- Scroll down to the Ad Creative section to upload your ad images, videos, carousels, etc.

- Click on Ad Preview to understand how your ad will appear to the audience.

- In the Destination section, copy and paste the product URL from the Shopify store.
To do that – Locate the Products section on your Shopify Partner account. Visit the Product Dashboard. Select the Product, scroll down to ‘Search engine listing,’ and copy the product URL.
- Publish your ad.
Your ad is ready for your target audience to see! You can duplicate the ad(s) to create more and edit them in Ad Creative.
Facebook Events Manager
For ad optimization and prioritizing customer’s actions, we use Facebook Events Manager (Meta Events Manager). It helps in providing insights on whether your ads are functioning. Using this boosts conversion rates and ad targeting.
Here is how to set it up:
- In the Business Suite, click the three lines called ‘All Tools.’ Choose Events Manager under Advertise.

- On the right side of the screen, click Manage Prioritized Events.

- Set up events for your domains. Click on any domain > Manage domain > Edit. You’ll reach this page:

- Add important events you want to track – purchase, for example, is the highest priority. So, under ‘Pixel/Custom Conversion,’ choose your Pixel. Select an Event name (say, Purchase) from the drop-down menu.
- For other events, click Add Event and follow the abovementioned step. You can do the same for other domains.
These events help the customer take action on your website. You range the events from Highest Priority (your main goal) to Lowest Priority. The data you’ll receive from this will help with campaign optimization.
- Finally, apply and save the changes.
Return to your Events Manager and test it out by selecting Test Events. Add the store’s URL in Test Browser Events. Your website should be running well. When you view your website in the Test Events, you’ll receive an Event saying ‘PageView,’ which means it works. Test it out for other events and see how you receive the data.
Do I Need A Facebook Ads Library?
Facebook Ads Library is where you search what other businesses are doing across Meta technologies. You can look for ads that are actively running on the platform. It is a great tool to track ads related to social causes, politics, and elections.

To answer the question, yes, the Ads Library will help you understand what your competitors are up to and what gaps you need to fill for a successful ad campaign. Here is a quick way to use it:
- Visit the Ads Library website. Locate Search ads.
- Enter the region you want to search for, say, the United States.
- Then, choose the ad category you want to search in the Ad Category section.
- Add the brand name you want to track. We have taken Phillips as an example.
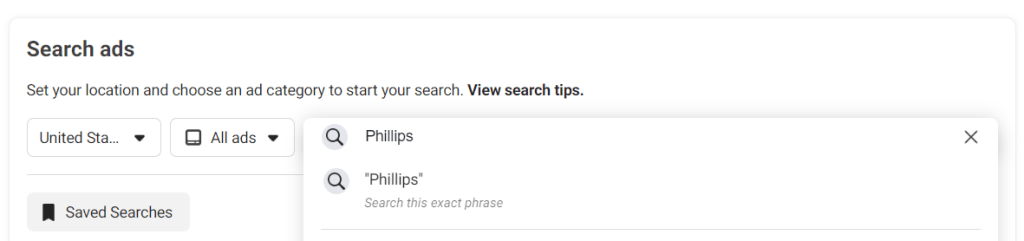
- Click on the brand, and you’ll be taken to another page.

You’ll see that this brand has 130 ads running on Meta. You can scroll down and navigate what ads are active.
And that’s how the Library helps you analyze what your competitors are up to and engage in ads focusing on social issues, elections, politics, and more.
| Exploring TikTok ads? You might also want to read: How to Run TikTok Ads for Shopify: Step-by-Step Guide |
Bonus: Facebook Ads Strategy
A successful ad campaign calls for a strategy. You can capitalize on your strengths and work on your weaknesses.
Here are some strategies to optimize your Facebook ads that can help generate more sales:
- Show Relevant Ads To The Target Audience
When you set relevant ads that will help a specific group of people, there is a higher chance of engagement than by showing it to people who do not find the ad helpful. You can – run A/B testing for optimization, use Audience Insights and go for low ad frequency.
- Broad Targeting:
Use broad targeting if you are new to the ad campaigns or focusing only on brand awareness, not conversions. Using broad targeting helps with finding your target audience.
Over time, you will find a suitable audience for your ads and check their behavior on your Ads Manager. You can even club two different audience groups- one whose needs are answered by your ad and the other one who may not require the product but can still find it useful in some way.
- Retarget The Audience:
Retarget your ads to the customers who have visited your store. For this, use Engaged Shoppers. It helps in targeting store visitors who visited in the past week.
You can also try Custom Audiences for this purpose and the Narrow Audience feature to get detailed results.
- Target Based On Different Criteria:
Audience Insights can help you find the activities of your potential customers. For example, ads can be set up based on their hobbies, life events, or the weather in their area.
For instance, you want to sell a portable ice box. You can track your audiences and see that a particular group likes traveling. You can target ads portraying how the ice box can be excellent for road trips or an outdoor barbecue.
Bonus: To improve your Facebook ads strategy, we have a list of best Facebook ads apps for Shopify that you must check out.
Conclusion – Prerequisites For Launching Facebook Ads For Shopify
To summarize, having your Facebook ads checklist ready can streamline your ad campaign journey. Without this, the process will be confusing, and you can miss important elements. The setup ensures you have everything ready before the execution of the ads.
With its massive user base, Facebook is an excellent marketplace for advertising your Shopify store products. You can easily reach many people based on their age groups, genders, and more attributes.
Having a strategy at hand can make your ad campaign smooth and hassle-free. So, get ready with the setup and make your Shopify store the next big thing.
FAQs
Do we have to create a campaign for each product?
You can add new ads to your ‘ad sets’ on Ads Manager. Either create a new one or duplicate and edit an existing one.
You can create new campaigns for every product, but a faster way would be creating a new ad within the ad set. If you want to categorize different products, you can create a new campaign or choose an ad set.
Why is my Facebook Account restricted from using the Facebook Channel App?
Your account getting restricted can be due to several reasons: Ad violations, promoting sensitive products unsuitable for general audiences, promoting Facebook assets without permission, and feedback from customers being negative.
Also, if you see the sales channel is ‘unavailable,’ your Shopify store is ineligible for the sales channel. To rectify this, select ‘You can’t add this channel’ to find the root cause.
Can multiple ad accounts be created for one Business page?
You can have multiple ad accounts on your Business page. However, this has a limitation – you can only add 25 ad accounts. Also, the 25 ad accounts can be admins, analysts, or advertisers.
Once you reach the limit, you’ll be asked to remove an account by the person having the admin rights. While using multiple accounts, ensure you do not advertise similar ads from different ad accounts. This can lead to your account being disabled.
Why am I getting warning messages after using Meta Pixel?
There are several reasons for this to happen – empty parameters that need a value, over-reporting of a product purchase, mismatch in the event name, missing event name and violation of financial and health-related data.
Check Out These Related Articles:


